
My little brother hates chocolate.
Tears would ensue if you even attempted to offer him chocolate as a toddler. These days he isn’t quite as likely to throw a tantrum, but he still won’t be happy if a blob of brown ends up in his strawberry-vanilla portion of neapolitan icecream.
Personally, I – along with most people – can’t really imagine a world without chocolate. A day rarely goes past where I don’t nibble at a block in the pantry, or indulge in some icecream or brownies. Although my favourite way to indulge is Lindt couverture, I’m not particularly fussy – I love the sweetness of Easter eggs and white chocolate!
I love cooking with chocolate almost as much as I love eating it. But to keep it fair, I figure I should bake something without chocolate every now and then for the little one. Although this Very Vanilla Cake will no doubt be met with questions of “Is it white chocolate?” (try explaining to a six-year-old that white chocolate isn’t really chocolate), I’m sure it’ll be greatly appreciated by the biggest vanilla fan in the house, as well as the rest of the family!

I searched long and hard for a suitable vanilla cake recipe. I didn’t want something too dry or heavy, or worst of all, lacking in vanilla flavour. I had originally bookmarked Sweetapolita’s recipe for a Very Fluffy Vanilla Cake, but after reading the comments of various failures I chickened out a little. I generally don’t like using American baking recipes as, even with conversions, they never seem to work perfectly for me. In any case, I ended up using the vanilla buttercream recipe from Sweetapolita (though without vanilla beans), but sandwiched with a Peggy Porschen vanilla bean Victoria sponge soaked with a vanilla sugar syrup. I figured that would be vanilla-y enough!
The result? A lovely, moist layered vanilla cake, and probably the creamiest frosting I’ve ever had.
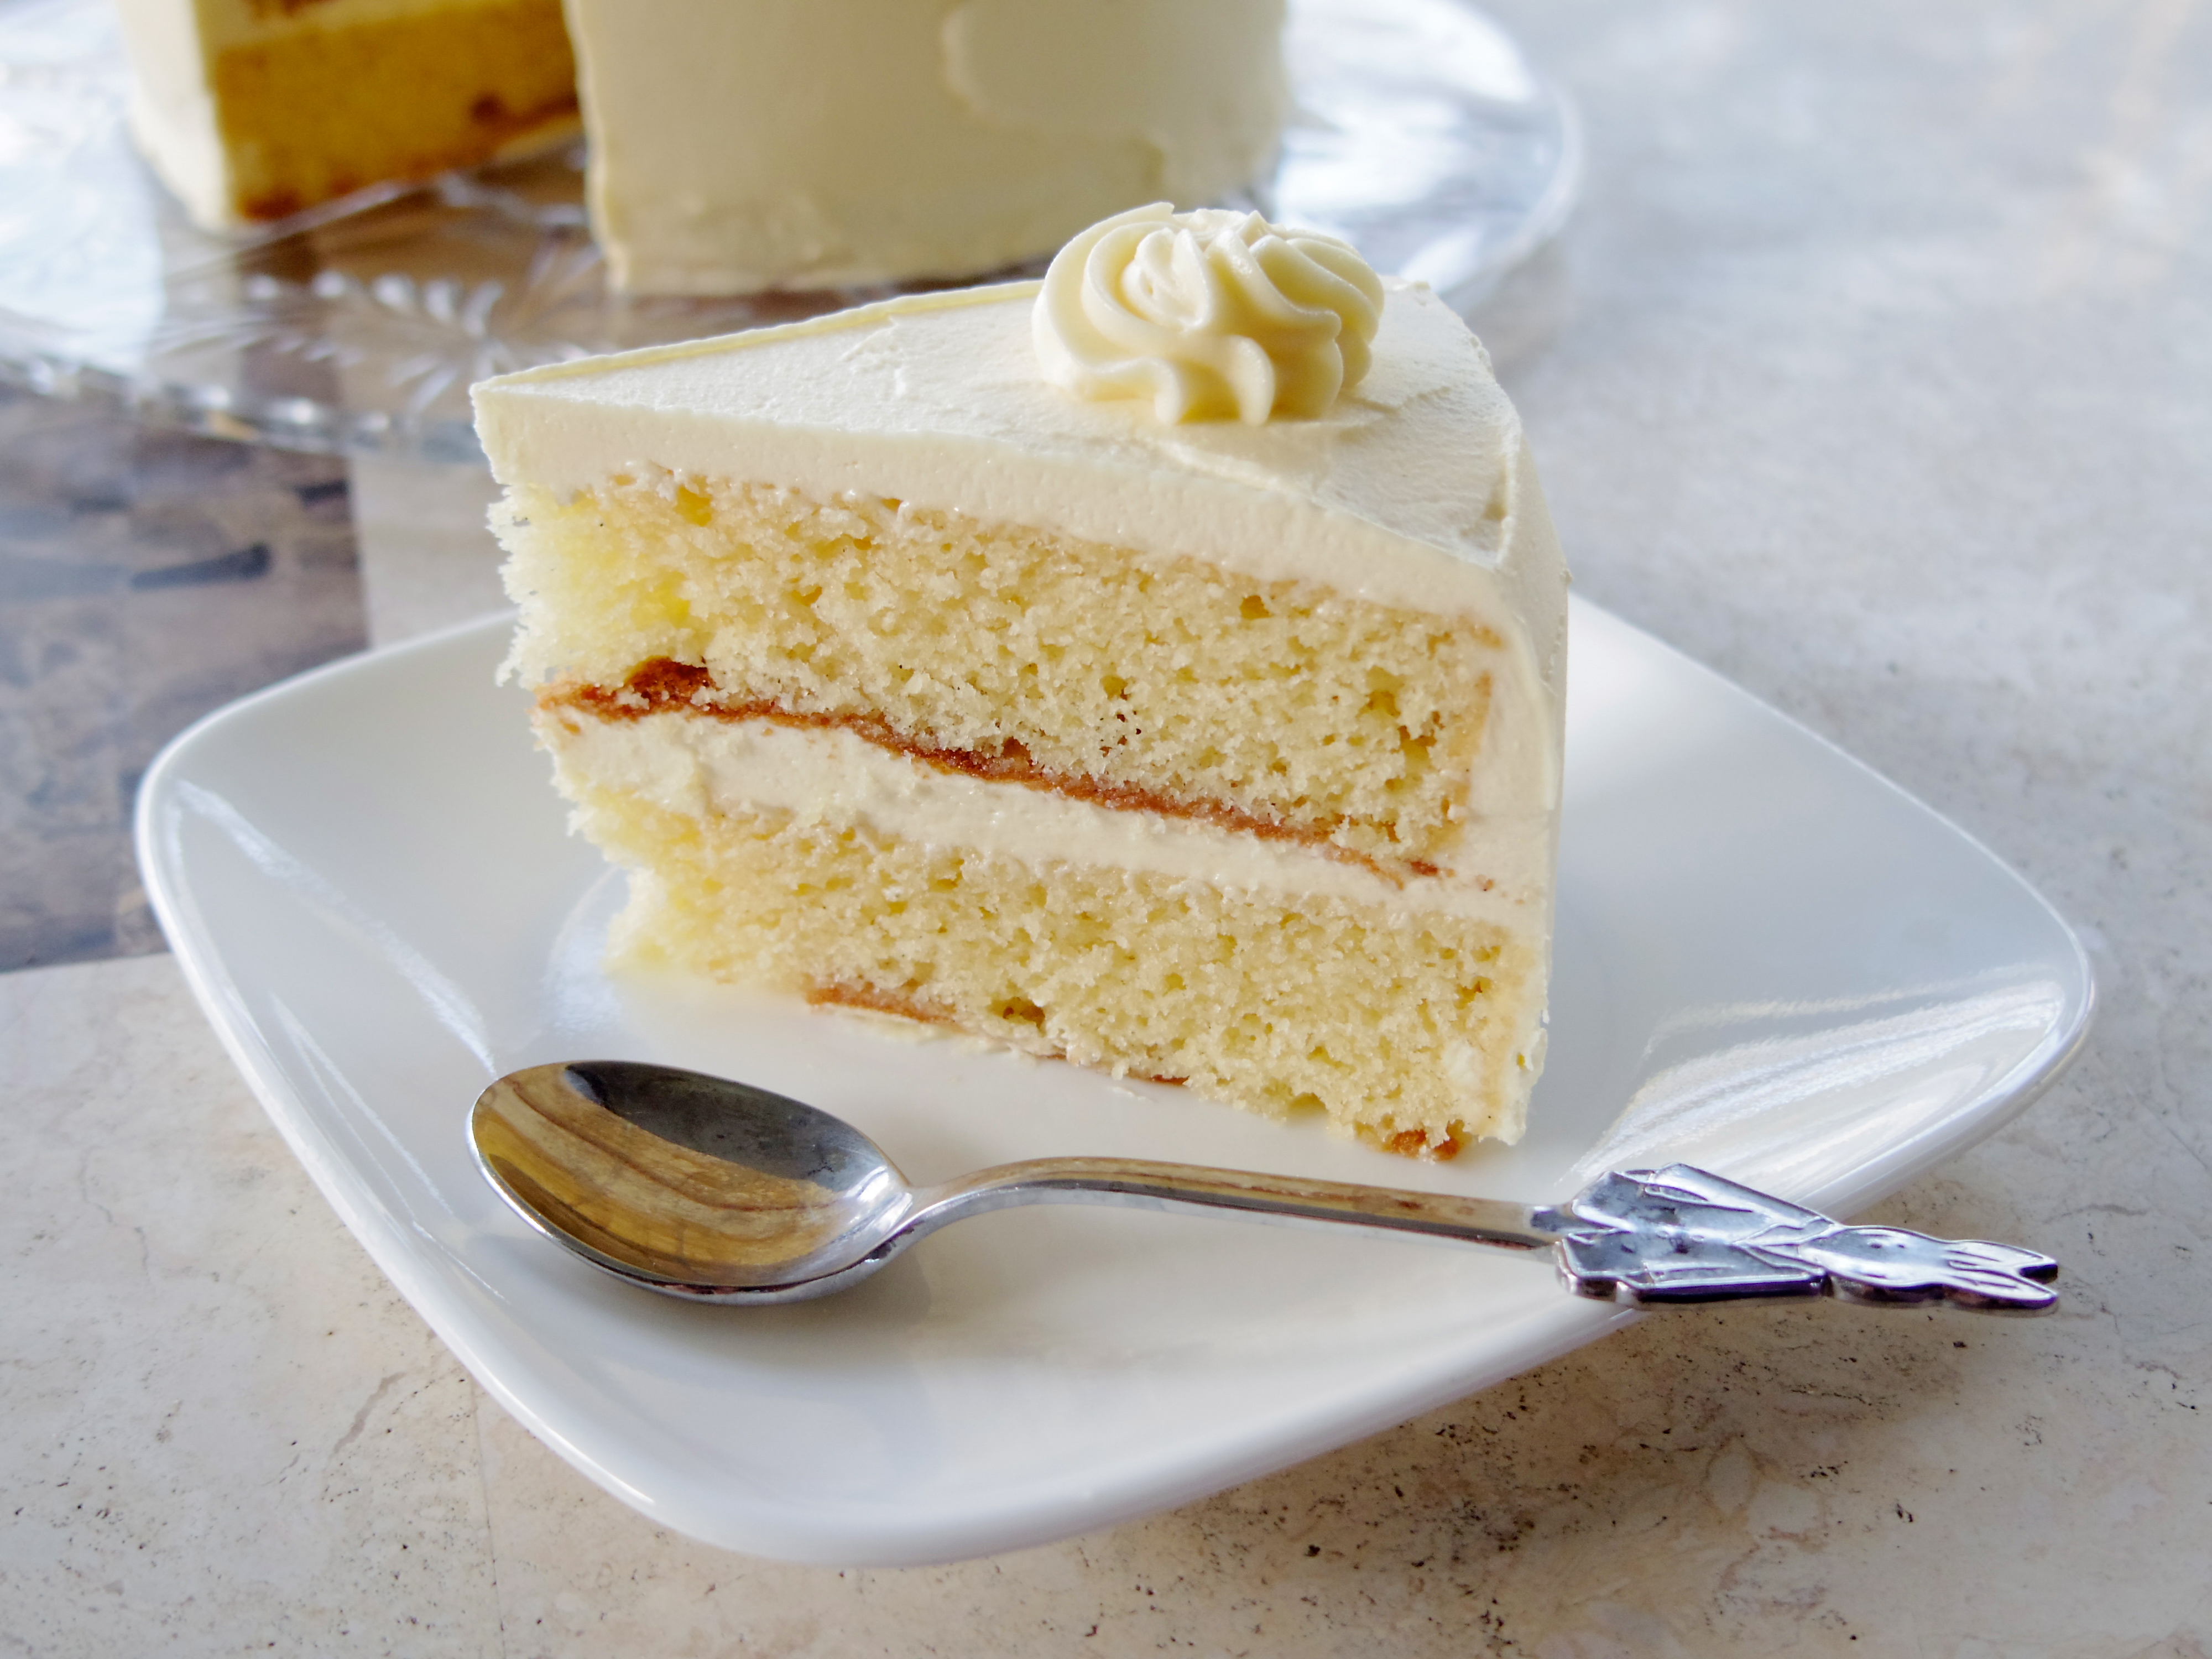
Very Vanilla Cake
Sponge adapted from Peggy Porschen’s Cake Chic, buttercream frosting adapted from Sweetapolita
Vanilla Victoria Sponge
Ingredients
- 100mL water
- 75g sugar
- 1 tsp good-quality vanilla extract (alternatively, the seeds of 1/2 a vanilla pod)
- 200g butter, softened
- 200g caster sugar
- Seeds of one vanilla bean (alternatively, 1tsp vanilla bean paste)
- 4 eggs, at room temperature
- 200g self raising flour, sifted
Method
- Firstly, combine the water, sugar and extract in a small saucepan and bring to the boil over a medium heat. Set aside.
- Grease and line the bottom and sides of two 8-inch sandwich tins, ensuring the baking paper rises 3cm above the edge of the tin. If you have them, place a Wilton flower nail in the centre of each pan (these help the cakes rise evenly rather than domed). Preheat the oven to 18o degrees celsius.
- Cream the butter, sugar and vanilla with an electic mixer fitted with a paddle attachment until pale and creamy, approximately 5-8 minutes.
- Beat the eggs lightly in a jug, and then add slowly to the butter mixture while beating on medium speed. If the mixture starts to curdle, stop adding the egg and see if continuing to beat will return the mixture back to normal (this usually occurs). If the mixture still looks curdled, add a tablespoon of flour and continue mixing.
- Once the egg mixture and butter mixture are combined, incorporate the flour at a low speed until just combined.
- Spread the cake batter evenly between the two tins, and flatten the surface using a palette knife. Bake for approximately 25 minutes, or until a skewer inserted into the cake comes out clean.
- Allow the sponges to rest for around 15 minutes, and then prick the surface with a toothpick. Soak the sponge with the vanilla syrup using a pastry brush (note: I used around a quarter of the syrup but would recommend using more if you will be storing the cake for more than one day).
- When the sponges are completely cool, invert to a wire rack.
- Make the Fluffy Vanilla Buttercream (recipe below).
- Smear a small amount of buttercream onto your serving plate or cake board, and then place one of the sponges, top side down, onto the plate. Spread around a cup of icing onto the bottom of the cake using a palette knife. If your cake has a lot of crumbs you may find it useful to do a crumb coat first.
- Place the other sponge on top of the first one, top side down. Centre the cake and then cover the top and sides with buttercream, using a palette knife to smooth.
- Use any remaining buttercream to decorate the cake with a piping bag if desired (I did small rosettes).
Fluffy Vanilla Buttercream
Ingredients
- 375g butter, softened
- 3 cups/475g icing sugar, sifted
- 2.25 tblsp/45mL milk
- 1 tsp vanilla extract
- Optional: seeds of one vanilla bean (I didn’t do this)
Method
- Beat the butter using a paddle attachment on an electric mixer for 8 minutes on medium speed (‘4’ on a KitchenAid)
- Add remaining ingredients and combine on a low speed; increase to medium speed and beat for 6 minutes.
- This icing is best used immediately. It will go hard if kept in the fridge, however it should return to its original consistency if brought back to room temperature. You may need to beat the mixture again to make it smooth.
Notes
- Try to avoid making this on a hot day (like I did). Heat and butter don’t really mix well! If you do make it on a warm day, either assemble the cake as close as possible to serving and leave it out of the fridge in the coolest part of the house, or if you make it in advance, the cake can be stored in the fridge but is best brought back to room temperature before serving. Ensure you syrup the cake well if you are doing this – the cake may dry out regardless, though it will still be yummy!
- Also, on a hot day your icing may begin to soften as you are layering and icing the cake. If this happens you can put the cake and the icing in the fridge for short bursts to firm it up. You may need to beat the icing again when it comes out of the fridge for a smooth consistency. Either way, you will probably get better results on a cool day (or if you have really good air-conditioning), but it will still taste fine!
- Using the flower nails helps to avoid the ‘domed’ look on a cake, which makes it hard to layer. If you don’t happen to have a flower nail at home (they’re around $4 in cake decorating shops), you may need to level off the sponges using a serrated knife.
- Peggy recommends you use around half of this quantity of syrup for this size cake. I used a bit less and didn’t find the cake as moist as when I had previously used the same recipe. You can store the syrup in the fridge for up to one month, or you can make half of the quantity provided here.

Wow! This looks fantastically delicious! Love the pictures too!
Thank you! 🙂
This looks so gorgeous, well done! =)
Thank you! 🙂
200 g of flour to 200g of sugar? this dose not seem right. I am baking it right now in the oven in two 8″ pans. I have never seen such a skimpy layer of cake batter – is this because of the self rising flour?
Hi there,
I know the quantities are slightly strange but it worked for me, and that is straight from the book! The layers look quite thin but they do rise a lot. That said, unless you sandwich the layers with icing, the cake will be quite flat. Hope this helps 🙂
This looks beautiful xxx
Thank you! 🙂
Oh my, what a stunning looking cake! I love the idea of soaking with a vanilla syrup – must try it.
Thank you! It’s super yummy 🙂